
Recently I set up an Azure VM running SSRS for my students to host their database and report projects. My goal was to set up a custom domain name and use SSL. I ran into a few issues and a couple of wrong paths so I thought this would be helpful for others trying to accomplish the same. I’m not going to do a step-by-step walkthrough, but instead a checklist to help you troubleshoot
1. Create a VM in Azure.
In this case, I selected the Standard D2s v3 image running Windows 10 Pro. You might want to run a bigger machine or switch to Windows Server. I selected this particular configuration to save costs while also having enough resources to perform well enough for these tiny databases and reports.
When creating the VM, you may want to create a new resource group. Add any other objects associated with the VM to the resource group. That way, if you want to delete the VM, you delete the resource group so that all objects are cleaned up.
2. VM Configuration
In order to use a custom domain, make sure that the IP address is Static. You can find this setting on the VM’s IP properties.

You need to make sure that the Network Security Group allows traffic on the ports. Click the Networking settings of the VM and select “Add inbound port rule.” You should allow 443 for SSL, but you may also want to open 80 for testing to make sure you can connect to SSRS without SSL first.

Make sure that you also open the Firewall settings inside the VM to allow the ports. This is where I messed up. I had forgotten to open 443.
3. Software Installation
This list is simple:
- SQL Server 2019 Developer Edition (Install the Database engine only unless you need additional features)
- SQL Server Reporting Services
- SSMS or Azure Data Studio
Configure SSRS as you would in any other situation. You may need to specifically grant administrator rights to your account in the SSRS web portal while remoting the VM. Run the browser as an administrator to do this. Note that if these are production reports instead of for class projects, you’ll need a different version of SQL Server.
4. Domain Name
I purchased a new domain name from GoDaddy.com which took just a few minutes, and it’s less than $20 for one year. To get this to work, I created an Azure DNS Zone. This ties the domain name to the IP address. I followed instructions here and here. I also set up the A and CNAME records in the DNS properties on GoDaddy. For whichever provider you use, you should be able to find some help on their site for managing sites hosted by other companies.
5. SSL Certificate
I also purchased my SSL certificate from GoDaddy. I used to deal with domain names and SSL certificates 20 years ago, but this took me a few times to get right.
After purchasing, you must generate a certificate signing request (CSR) on your server that is then submit it to the provider. I followed the instructions here to create the CSR. On GoDaddy, there are some instructions found here on requesting the SSL certificate. In this case, follow the steps found at “Request a certificate with a CSR that has already been created.” Using a CSR generated by GoDaddy was one of the mistakes I made. SSRS could never see the certificate in that case.
If you buy yours from another provider, they should have some instructions. Just make sure that the CSR is generate on the server, not by the provider.
6. Installing the Cert on SSRS
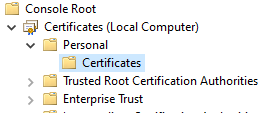
I’m having trouble finding the resource I used, but you will need to import the certificate from your provider using the MMC snap-in for Certificates. Right-click the Personal folder –> All Tasks –> Import which will launch a wizard. You’ll import the CRT file.
Now that the certificate is installed, it must be set up on SSRS but restart SSRS first. I used this article to help me configure the certificate on SSRS.
Once that is done, you should be able to connect to your Web Portal with the new domain name and using https.
Conclusion
It all seems so simple now! While this doesn’t give step-by-step instructions, I hope it is helpful for anyone else trying to accomplish the same task.


